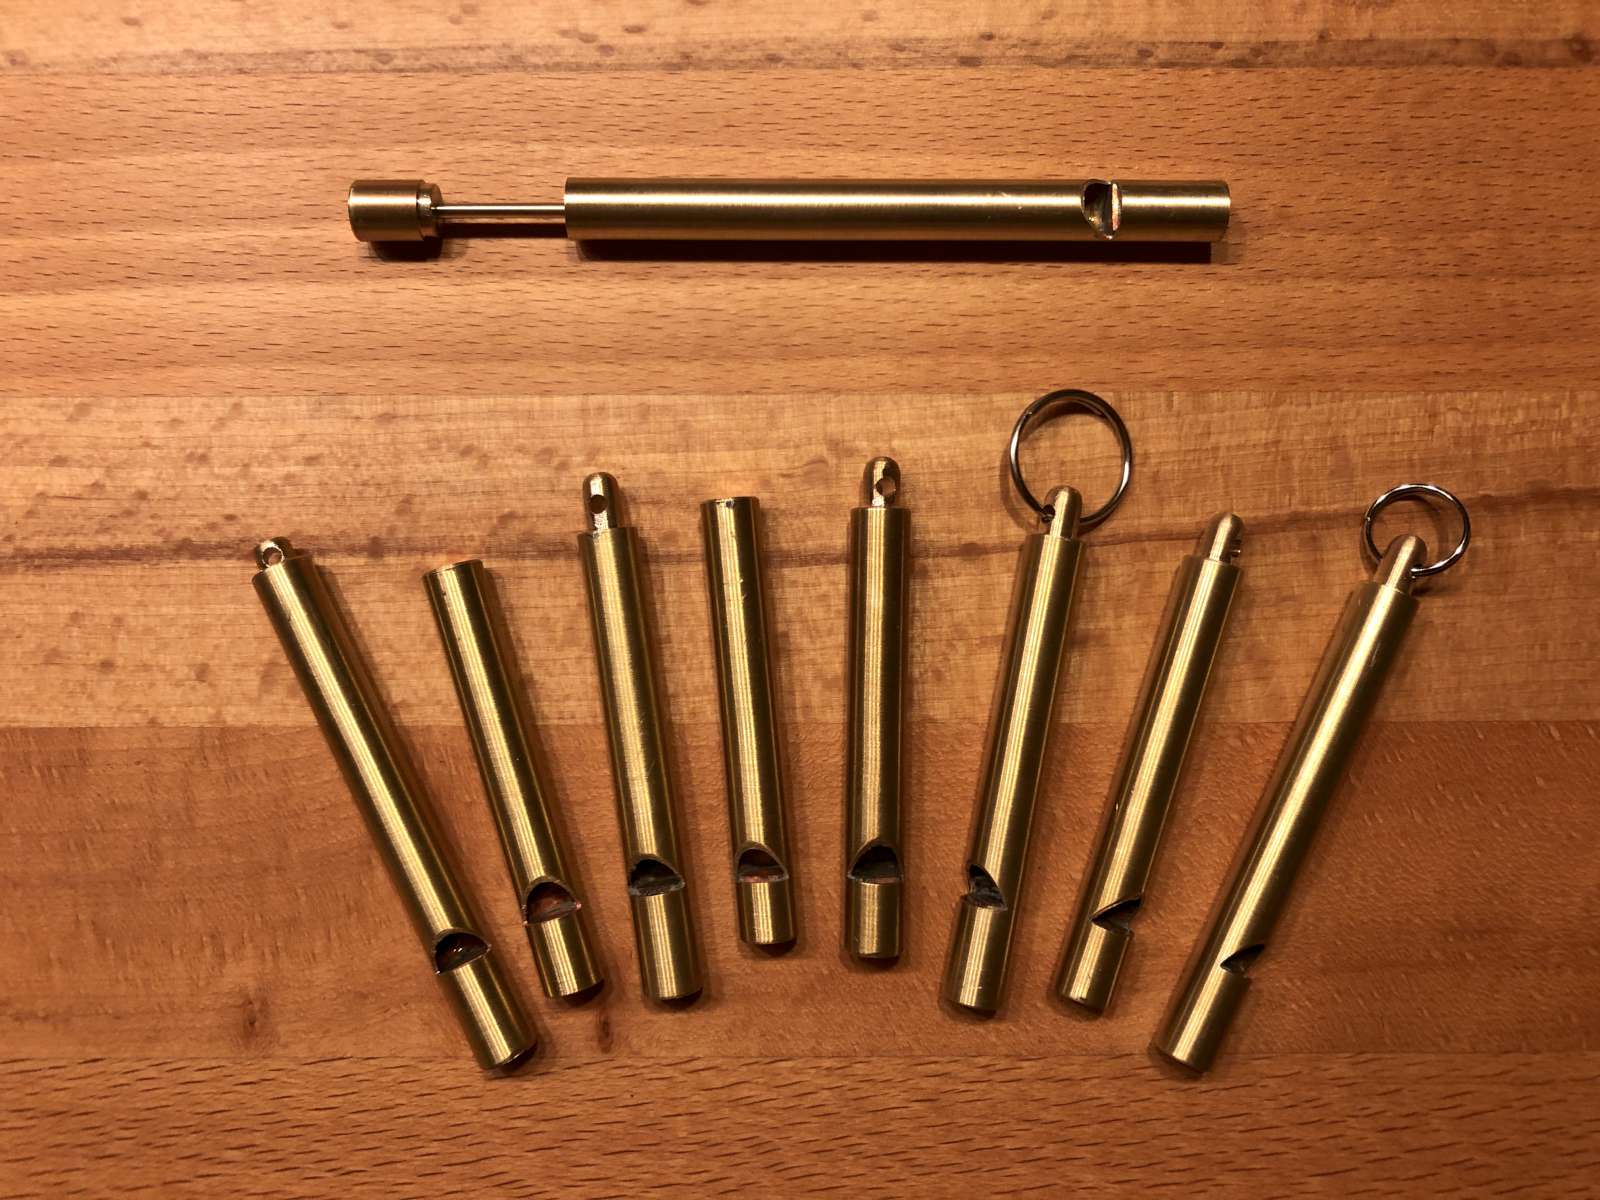
All the whistles I fabricated in a rainy Sunday afternoon. (click to enlarge).
This is a typical "rainy Sunday afternoon lathe project": a simple project built from scrap material just to have some fun. It all started with a discussion with a friend that likes hiking in the mountains like me where we both agreed that having a whistle on hand could be useful to get the attention of rescuers, should one fall or get injured while hiking alone. A whistle is not a difficult object to find, but it's also a simple enough project for the lathe. And I already had some experience with steam whistles from an older project.
All the whistles I fabricated in a rainy Sunday afternoon. (click to enlarge).
I wanted the whistle to be small, light, but made of metal so that it would last forever even if I drop it or forget it in the bottom of my backpack. I choose brass because it's easy to solder, it's easy to machine, it doesn't rust and mainly because I already have suitable pieces in my scrap bin.
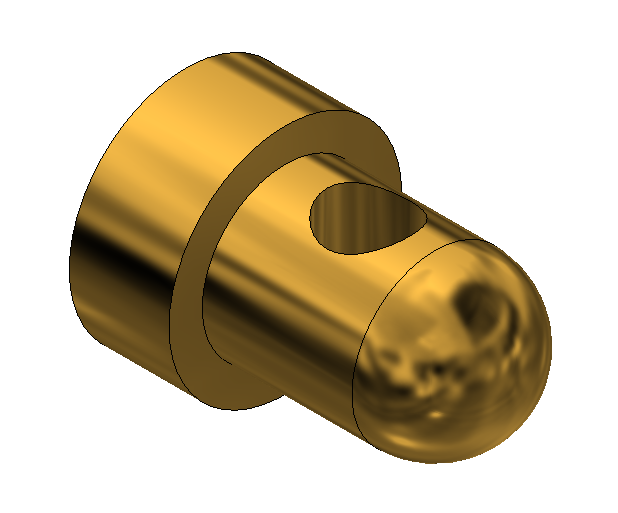
The whistle is composed by three parts soldered together: the body, the windway and the cap. The final assembled product is visible below.
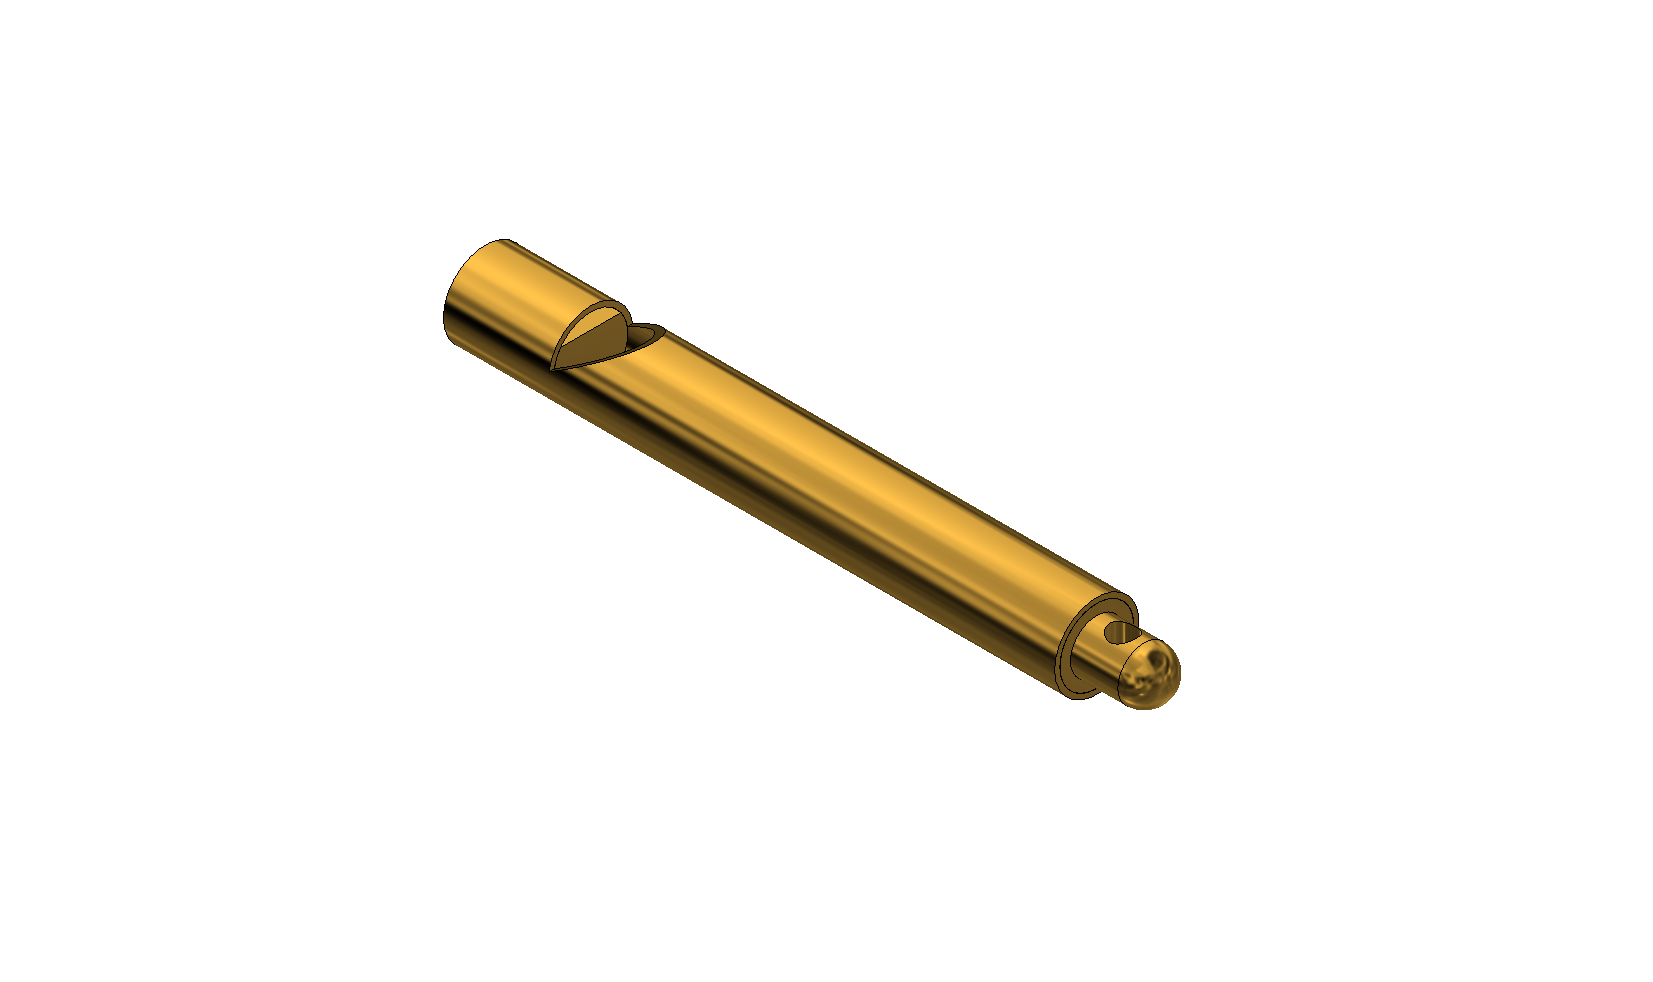
The finished whistle from two different points of view. (click to enlarge).
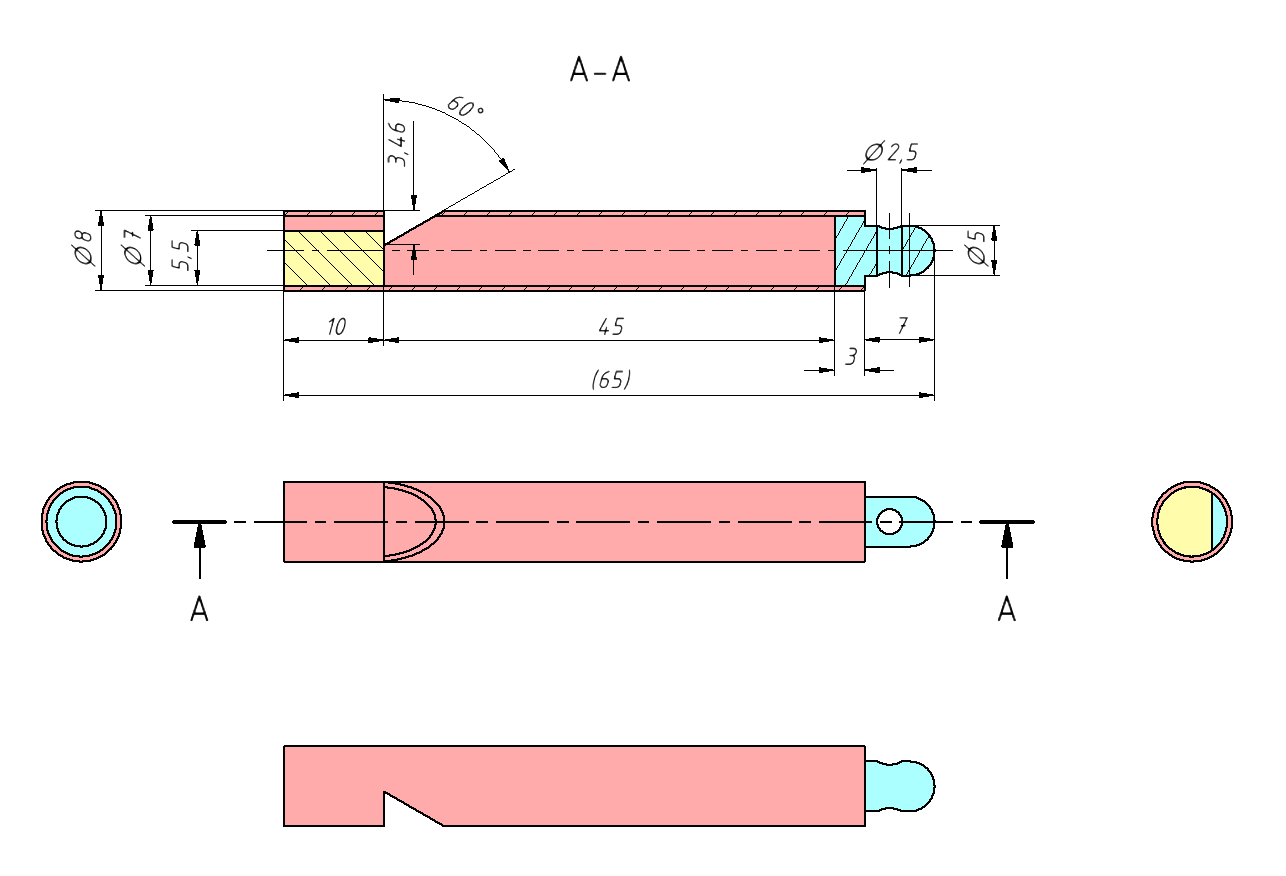
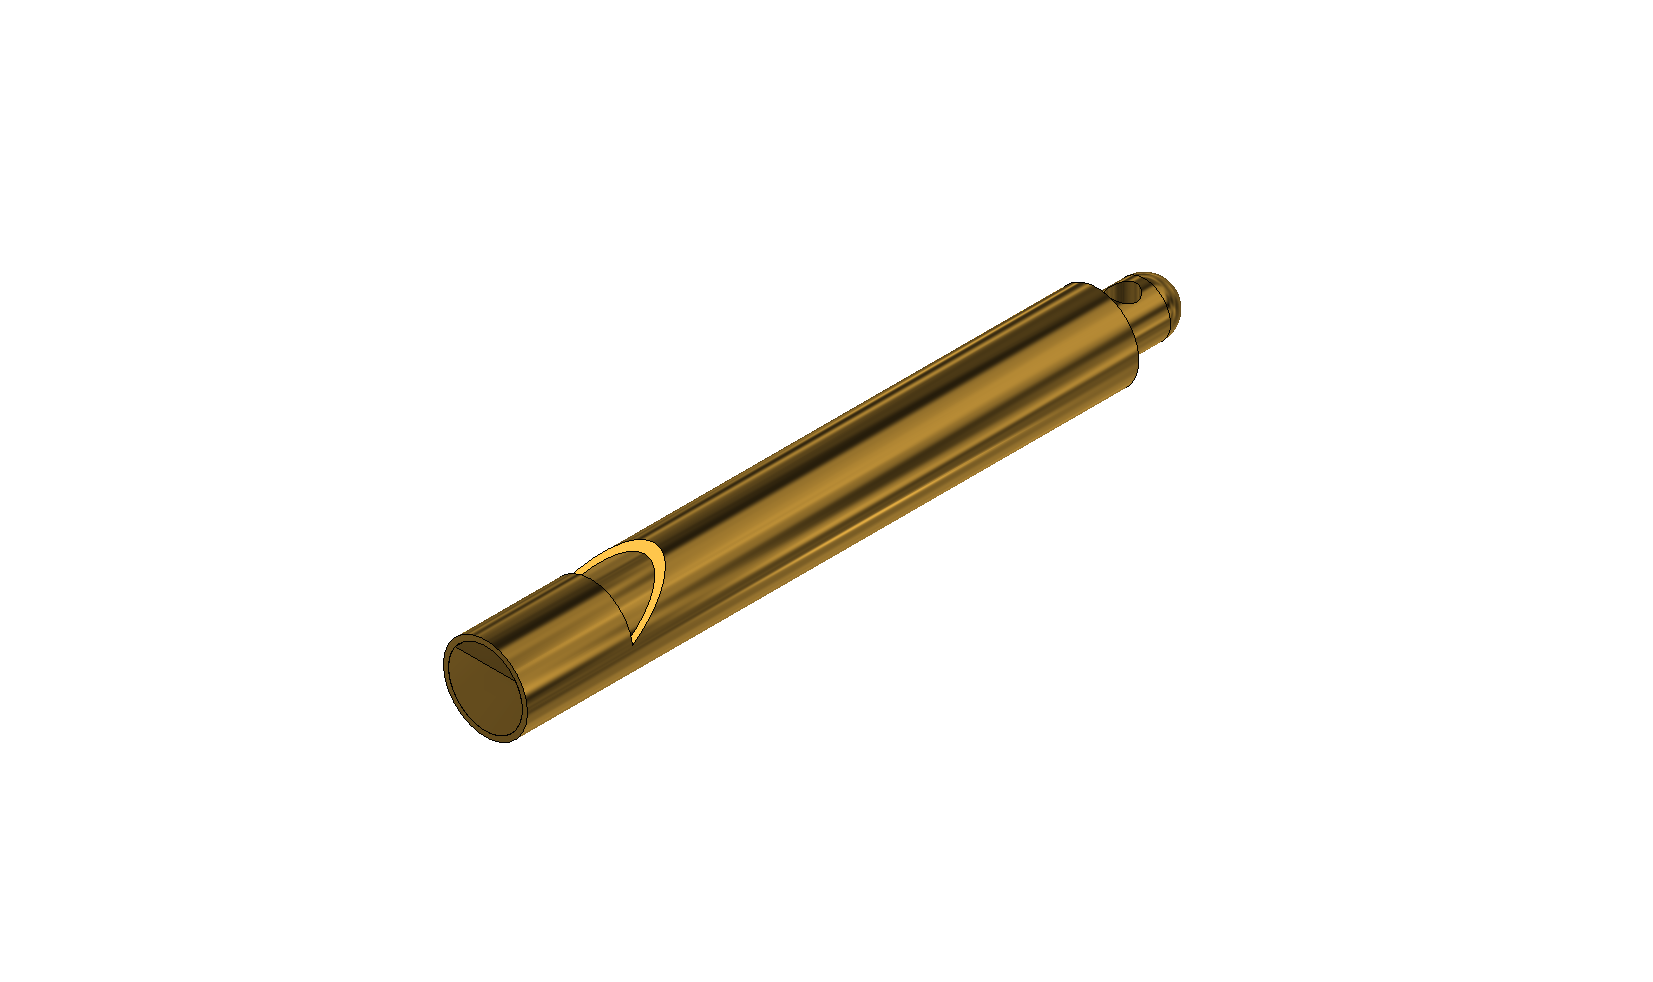
Detailed plan with dimensions of the whistle. (click to enlarge).
The body of the whistle is made of a Ø8 mm, 0.5 mm thick brass tube. The mouth is obtained by filing an opening with a 60° triangular file. It's important to keep the edges of the mouth sharp, so I simply used a Ø7 mm reamer in the inside diameter of the tube to deburr the mouth without rounding the edges. The depth of the mouth is also important and should be between 3.4 and 3.5 mm. Of course you can use a milling machine for this operation, but it's simple enough to do by hand with just a file.

The body of the whistle. (click to enlarge).
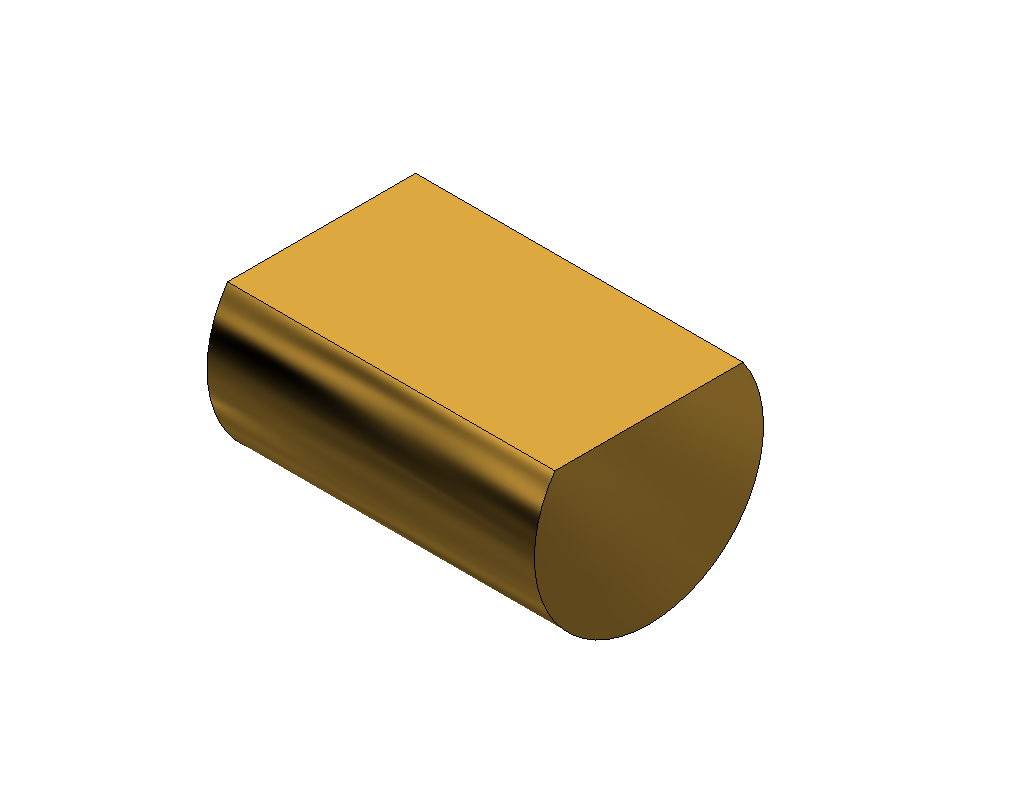
For the windway (that is also the mouthpiece) I turned down a piece of bar-stock to Ø7 mm or a tiny bit less, until it slides nicely in the body of the whistle, but without noticeable play. In theory you want about 0.05 to 0.1 mm play for the solder to flow, but in practice (for this project) it's enough to have it slide in with no effort. Then I filed down a flat until the thickness reached 5.5 mm. This dimension is critical: too thick or too thin and your whistle won't work. But you have ±0.1 mm tolerance or so, so it's another job that is easy enough to do by hand with a file without bothering setting up the part in the milling machine.
The windway piece of the whistle. (click to enlarge).
Now it's a good time to try the whistle with the just prepared windway and make adjustments if necessary, as it's almost impossible to remove after soldering. Don't forget to cover the other end with your finger.
I inserted the piece in the body of the whistle with some flux and soldered with lead-free solder and a blowtorch. I used regular plumbing flux and solder, but electronics solder would work as well. Care must be taken to use very little solder as too much would easily clog the windway (the small channel created by the flat that directs the air towards the mouth). The best way I found is to insert a tiny piece of solder inside whistle, against the gap where the two pieces join and heat the outside with a blowtorch: when the temperature is hot enough the flux flows, the solder melts and gets sucked in the gap by capillary action. After cooling the part, I put it back in the lathe and turned the face flat: this makes the solder joint almost invisible.
The first whistles I made had a 10 mm long windway to keep the whole whistle short, but later I found more practical to make it slightly longer, say 15 mm or so. This length is not critical.
I also turned a little brass cap for the other end of the whistle and solder it to the body in the same way. It's actually easier to just turn the outside diameter of the part to Ø7 mm, solder it to the body of the whistle, and then finish turning the little step to attach the keychain ring only after. Turning the step will clean the solder joint and make it invisible. I turned the dome shape by holding a file while spinning the whistle in the lathe.
The cap of the whistle. (click to enlarge).
To finish the whistle, I let it soak for a few hours in hot water to dissolve any flux left after soldering and make it shine by running it with some fine sandpaper.
For fun, I measured the frequency produced by the whistle and it turned to be about 1.9 kHz: as expected for a 45 mm long tube (it's the internal length that counts). While I was at it, I made plenty of whistles of slightly different lengths and even one with a sliding cap. Shorter tubes make a higher pitch but 35 mm is about the shortest that will still work (it will make about 2.6 kHz). Longer tubes make a lower pitch. I experimented up to 70 mm and got 1.2 kHz, but I think that longer tubes will work too.
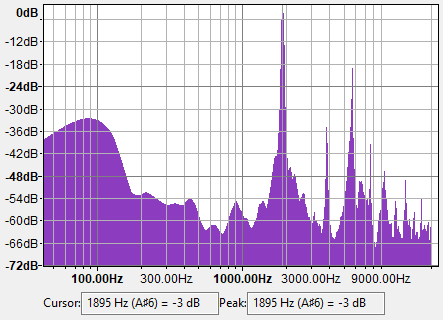
Measured audio spectrum of my 1'895&nsbp;Hz whistle.
Listen to this keychain whistle: whistle-1895.mp3 (24,658 bytes). It's just a simple whistle... what did you expect???
There is not much left to say about this simple project. Does it work? Yes, very well, it's a cool little whistle. Was it fun to build? Yes, sure, a lot of fun. Did I learn something? Of course, especially that getting the mouth and the windway right is very tricky. Wouldn't it be cheaper to buy one online? Yes, indeed, but that's not funny.
| Home | Mechanics | Page hits: 012595 | Created: 02.2021 | Last update: 02.2021 |